Building our new front porch and deck
The old porch was gettting quite weak and the deck we'd put up with pressure-treated lumber that was here when we bought the place was a bit too narrow for its length. Moreover, with grass around it, weeds were hard to keep out of the flower beds and the pernicious black flies and mosquitoes made it tough to enjoy sitting around with friends and a beer in May and June. The only real option for that particular irritant is a screened-in area.
As well, since the view to the east along the Eardley Escarpment is so nice, we hated to have to look past the Hydro Quebec power pole with its transformer, guy wire and cables so we decided to bite the bullet and have the power and telephone wires brought in underground from a pole partway down the driveway.
These pictures show selected highlights of the progress; click on a thumbnail to open a new window with the larger-sized version for more detail.
The page was updated 30 August, 2003 10:21 -- stay tuned for the new views from the hot tub and from within the screened-in porch!
Note that if you return to the page, you should press F5 or click the refresh button to force your bropwser to re-load the updated parts of the page; otherwise it may just display the page as it was stored in your cache the last time you looked at it.
Deck05-04xDSCN7681.JPG
61.06 KB; 600x383x24(RGB)
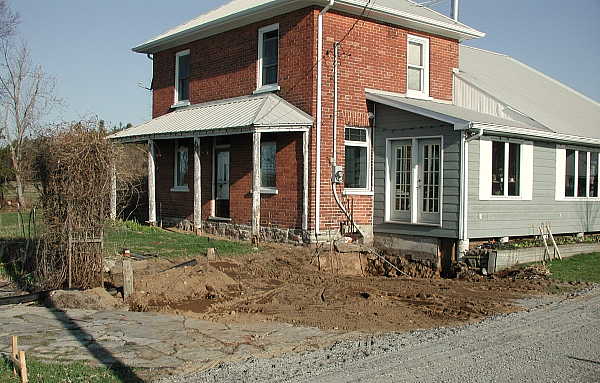
Old deck off; starting to dig foundation to be able to bring power underground and pour concrete in basement.
2003-05-04 07:56
Deck05-23xDSCN8198.JPG
72.75 KB; 600x450x24(RGB)
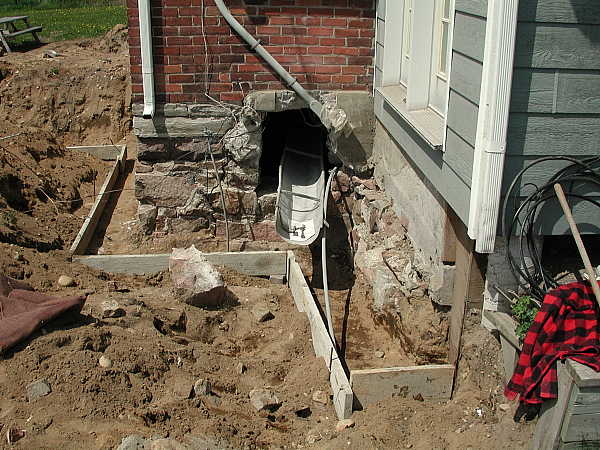
Eric broke the hole throught the 3' foundation rocks. This is just before the crew poured the footings and basement floor.
2003-05-23 09:28
Deck05-23xDSCN8204.JPG
50.83 KB; 575x383x24(RGB)
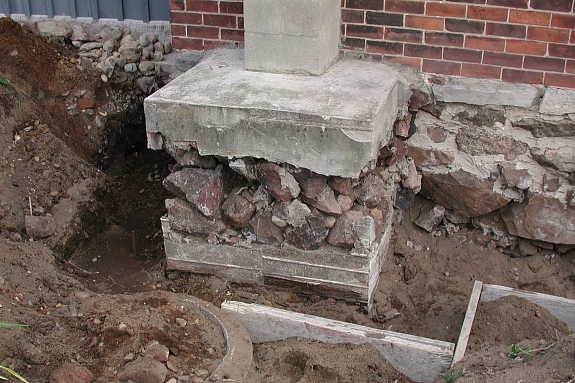
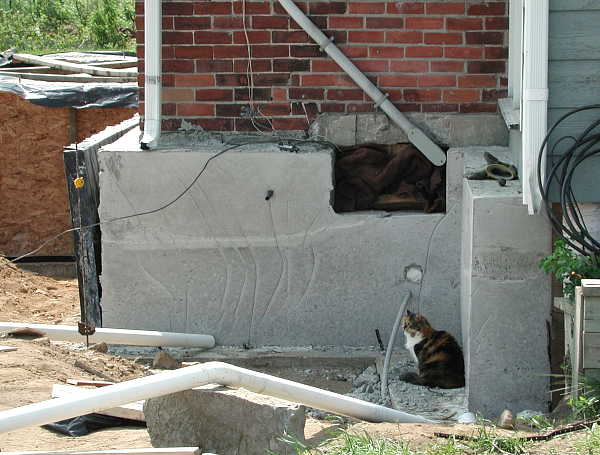
We were alarmed to see how the footing for the chimney had been prepared. There were also several well-worn mouse holes into the basement through these rocks!
2003-05-23 09:30
Deck05-30xDSCN8220.JPG
61.11 KB; 600x389x24(RGB)
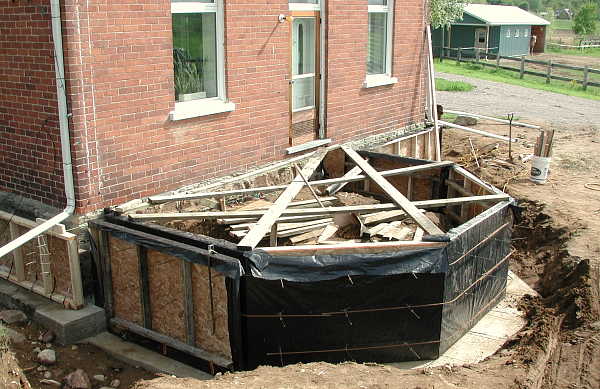
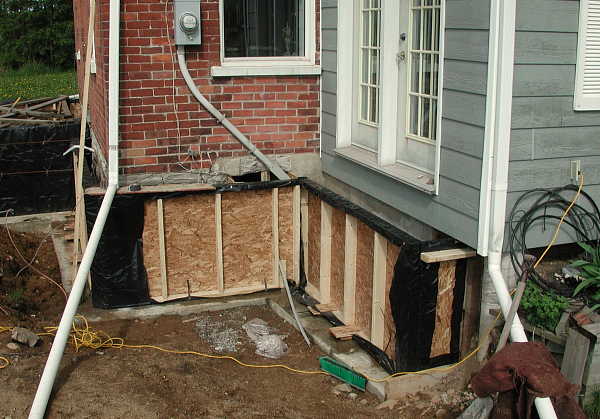
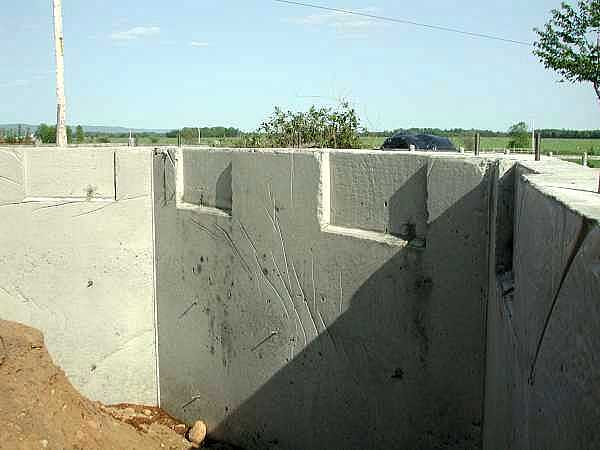
The crew wouldn't be able to complete the job until "late next week maybe." So, with help from Nigel and Tony, Eric decided to do it ourselves. This is the free-standing wall of the future screened-in porch.
2003-05-30 09:34
Deck0530xDSCN8223.JPG
56.96 KB; 600x419x24(RGB)
The trickiest forms were the ones along the face of the old foundation. Without the tension of the spacers through the wall, only bracing held back the concrete.
2003-05-30 09:35
Deck05-30xDSCN8241.JPG
51.60 KB; 600x392x24(RGB)
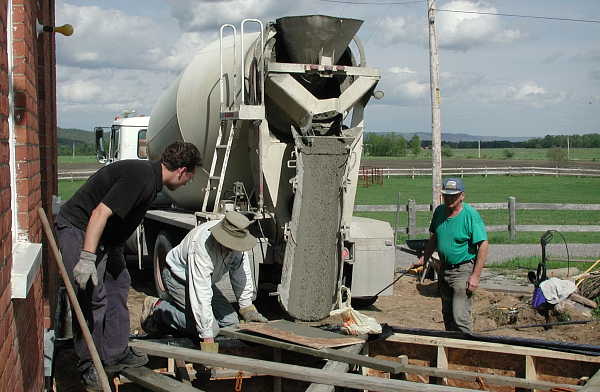
Pouring the wall. We'd already had an incident where the straps on the base of the wall in the previous picture had snapped. We stopped the pour and frantically added more bracing!
2003-05-30 16:13
Deck05-30xDSCN8252.JPG
61.95 KB; 600x450x24(RGB)
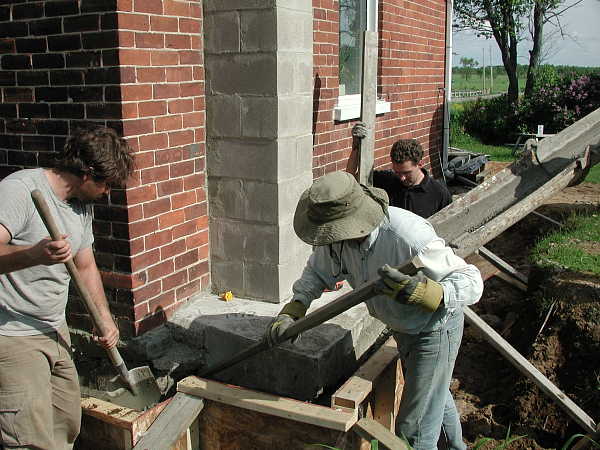
Eric, Tony and Nigel working on the wall. This section went very well but we were all a bit nervous because of the problem with the first part.
2003-05-30 16:19
Deck05-30xDSCN8272.JPG
61.63 KB; 600x450x24(RGB)
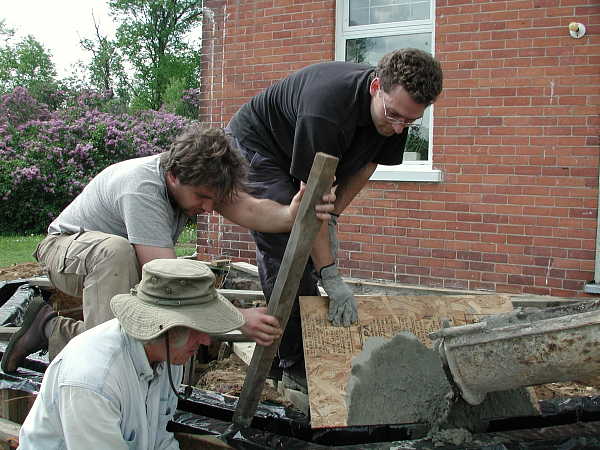
Working the concrete in around the chimney base. Moments later, the form near Nigel started slumping too. We managed to brace it but it was tense!
2003-05-30 16:53
Deck06-01xDSCN8355.JPG
55.42 KB; 600x455x24(RGB)
Sunday morning: Tigger surveys her changing domain. The wall is lightly bowed but smooth and strong. No rodent will ever make it through now!
2003-06-01 14:40
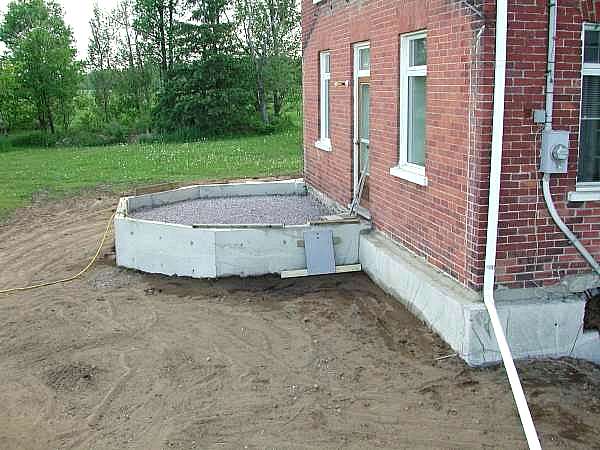
Deck06-02xDSCN8379.JPG
51.58 KB; 600x450x24(RGB)
Forms off... notice the honeysuckle vine wrapped in its arbour? We moved it by hooking chains under the rootball and hoisting it with the tractor bucket!
2003:06:02 17:28
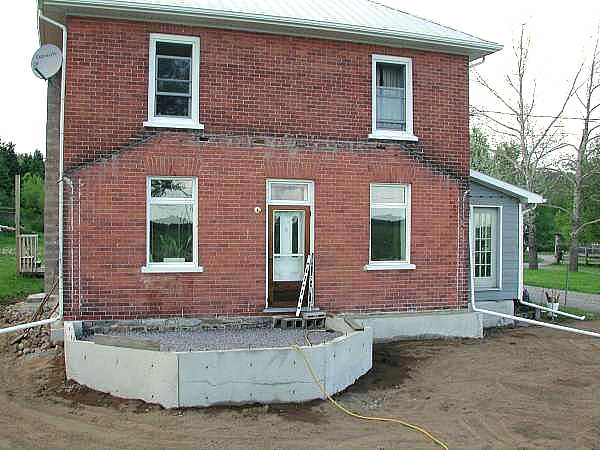
Deck06-02xDSCN8377.jpg
54.45 KB; 600x450x24(RGB)
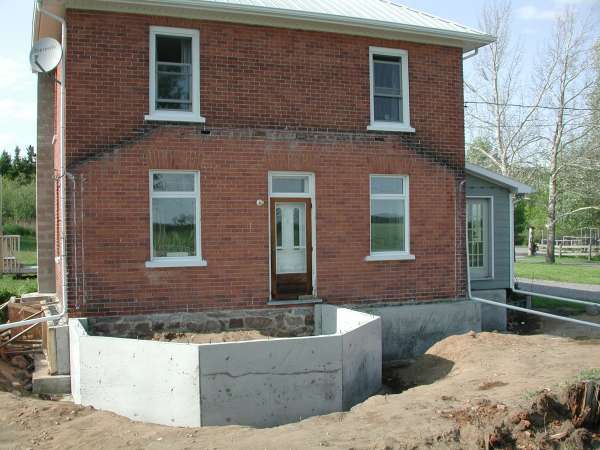
View from the front with the forms off.
2003:06:02 17:27
Deck06-02xDSCN8380.jpg
37.04 KB; 600x450x24(RGB)
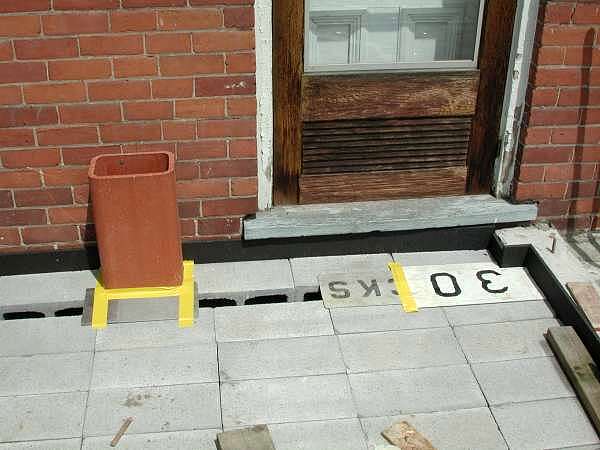
The "punch-outs" will let air from concrete blocks under ther slab and tiled floor waft up under the windows. I'll move it from the hot ceiling via fans and a duct against the brick wall.
2003:06:02 17:28
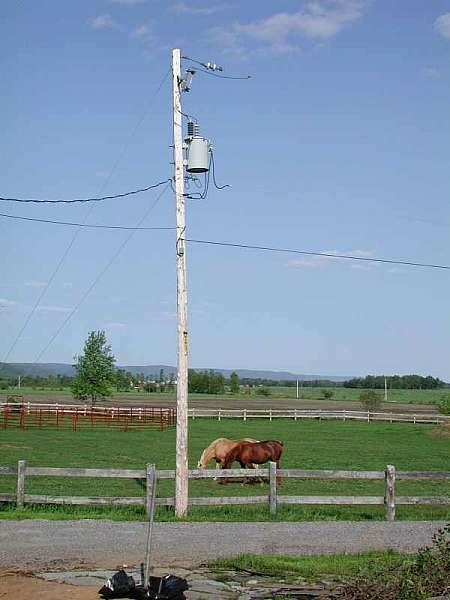
Deck06-02xDSCN8382.jpg
41.50 KB; 450x600x24(RGB)
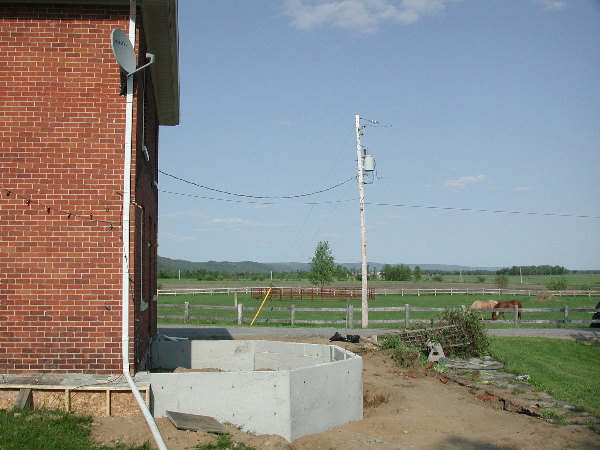
This is the view of the post and transformer from approximately where the hot tub will be located on the deck. See why we want it gone?
2003:06:02 17:29
Deck06-06xDSCN8387.jpg
56.87 KB; 600x450x24(RGB)
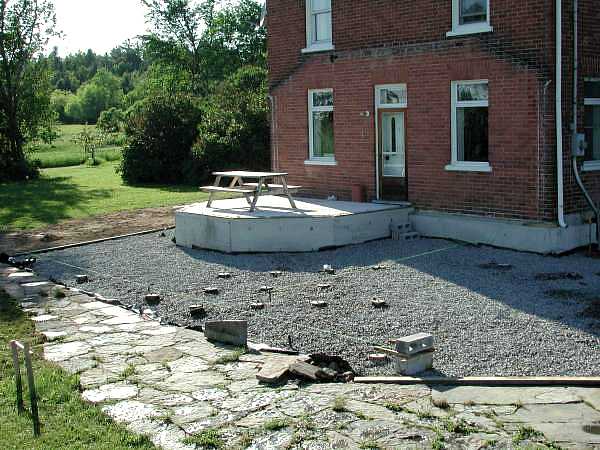
Backfilled around the walls and inside the future sunroom. The crushed stone is leveled and ready for the concrete blocks but we'll prepare as many sonotubes for deck footings while leaving a path for the concrete truck.
2003:06:06 17:56
Deck06-06xDSCN8389.jpg
61.90 KB; 600x450x24(RGB)
I used a power tamper to pack down the crushed stone and the area in front. Most of what you see here as dirt will be covered by deck.
2003:06:06 17:56

Deck06-06xDSCN8394.jpg
49.76 KB; 600x450x24(RGB)
Air will be drawn down from the sunroom ceiling through the flue liner, then pass through the concrete blocks under a 4" concrete slab with tiles on top. Heat stored in the slab will then bleed off during the evenings. (The air gets out through the vents under the windows).
2003:06:10 16:59

Deck06-06xDSCN8396.jpg
57.15 KB; 600x450x24(RGB)
The grid of 9 sonotubes should provide lots of support for the hot tub! Four was on the minimal side and making the beams would be more complicated with other configurations.
2003:06:10 17:00
Deck06-06xDSCN8397.jpg
55.46 KB; 600x450x24(RGB)
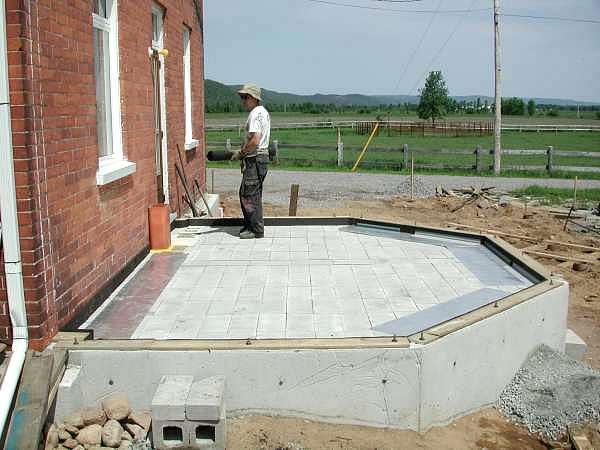
The blocks are on half of the floor. The slab will be poured on tar paper on the blocks and brought up to about half an inch below the plate. I want the slab to be completely separate from the walls to reduce the chance of cracking. The line on the left side will be the southern extent of the deck: the part beyond the hot tub will be one step down from the main level.
2003:06:10 19:00
Deck06-12xDSCN8403.jpg
47.28 KB; 600x450x24(RGB)
Blocks are now laid for the air core. The flue pipe left of the door opens into the 3" manifold to allow air to get into the cores to move out to the edges. We've put thicker aluminum over the manifold here but all of the gaps will soon be covered.
2003:06:12 12:01:11
Deck06-12xDSCN8409.jpg
52.11 KB; 600x450x24(RGB)
With all of the gaps covered, we're about to put a layer of tarpaper down to prevent the dry blocks from pulling water out of the concrete. The fibre expansion joint around the perimeter will isolate the floor pad from the walls. The wire mesh sheets are cut and laid out on the lawn ready to drop in as the concrete is poured. I just got the call that the truck will be there within the hour.
2003:06:12 14:47:40
Deck06-12xDSCN8414.jpg
57.92 KB; 600x450x24(RGB)
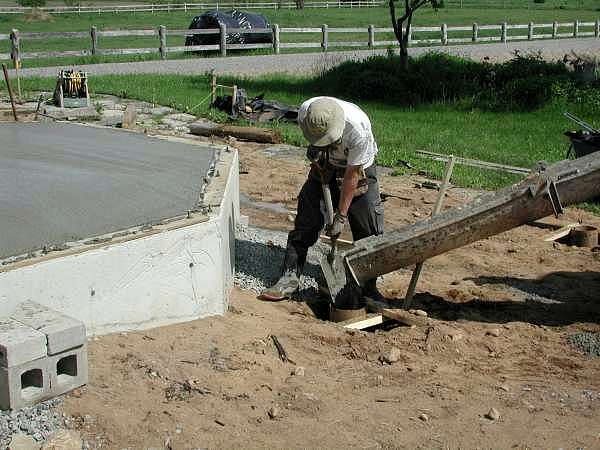
The floor is poured and had its initial screeding; now we're starting to fill the 20 sonotubes. Since the long walls are 16 feet apart, we had to screw 2x4s to the ends of a 16' board to be able to get the floor surface flat. This pour was a lot less stressful -- and took just over an hour.
2003:06:12 15:42:07
Deck06-16xDSCN8457.jpg
58.88 KB; 600x450x24(RGB)
I raked the area under the deck to make a smooth grade to take water away from the house, then laid black 6mm plastic down and covered it all with washed stone. This should also help prevent pants from growing under the deck.
2003:06:16 18:15:09
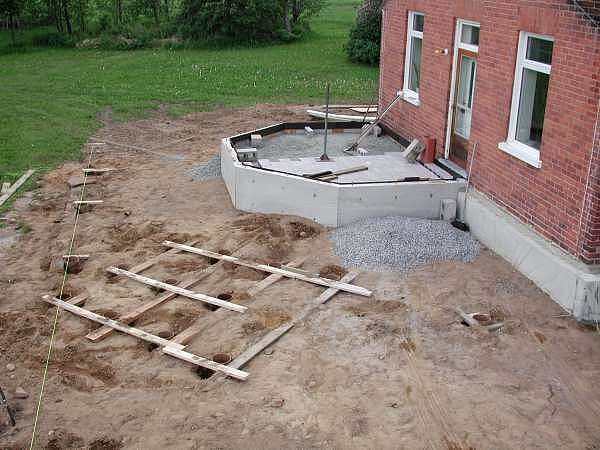
Deck06-16xDSCN8460.jpg
68.12 KB; 600x450x24(RGB)
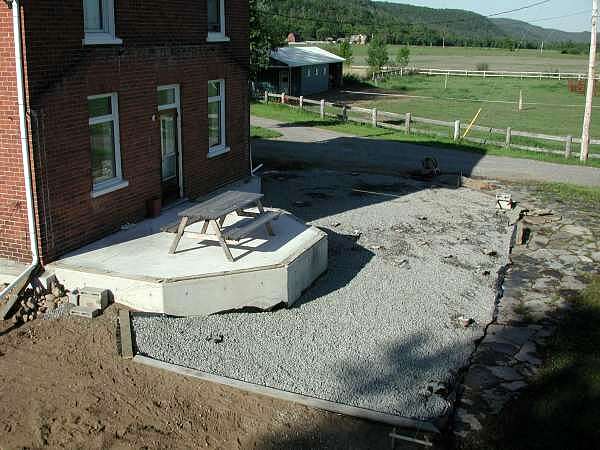
This shows the sonotubes and reference lines. Note that we've already been enjoying the future sunroom area -- and getting to know the views! The grid of 9 sonotubes will support the hot tub.
2003:06:16 18:17:24
Deck06-27xDSCN8582.jpg
62.45 KB; 600x450x24(RGB)
Richard Wegner drilling into the foundation to attach ledger boards for the beams. The beams are 2x10s bolted to the 4x4 posts and will support a 2x8 grid of joists. It seems excessive but adheres to code... The lumber for the joists and the cedar decking arrived today.
2003:06:27 13:29:10
Deck06-27xDSCN8583c.jpg
44.80 KB; 600x320x24(RGB)
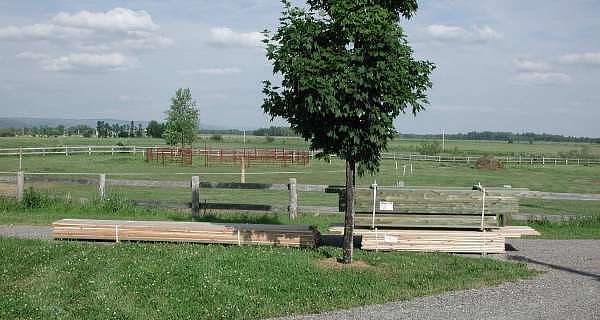
June 27: Decking and joist lumber arrives. The left pile of 64 Western Red Cedar 16-foot boards seemed just too risky to leave out where someone might hoist them so I moved them under cover -- making the garage smell like a clothes closet!
2003:06:27 17:33:51

Deck06-27xDSCN8587.jpg
62.09 KB; 600x450x24(RGB)
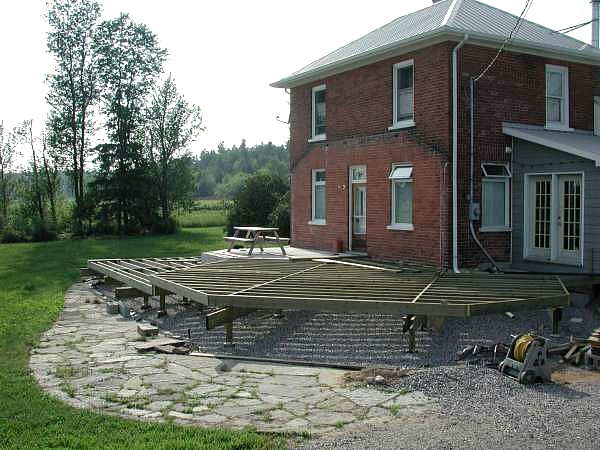
Detail of the posts and beams. The 2x10s are bolted to each post to support the joists. The posts are set on raised metal post anchors bolted to the concrete-filled sonotubes. The joist boards here are not attached yet.
2003:06:27 19:10:13
Deck07-01xDSCN8630.jpg
67.88 KB; 600x450x24(RGB)
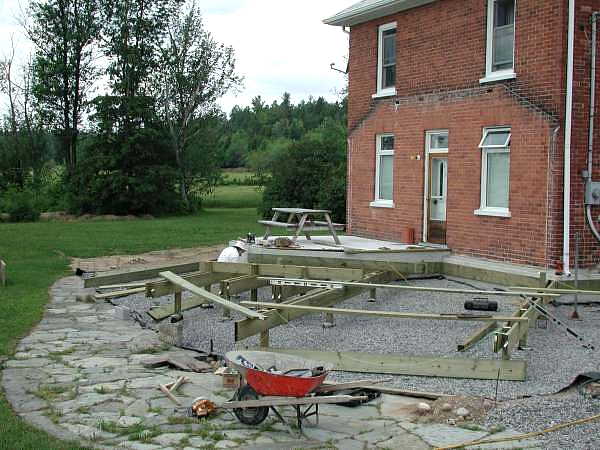
First panel of joists installed. The post sticking up closer to the house will support one of the 3 posts holding up the porch roof.
2003:07:01 07:07:14
Deck07-04xDSCN8648.jpg
61.73 KB; 600x450x24(RGB)
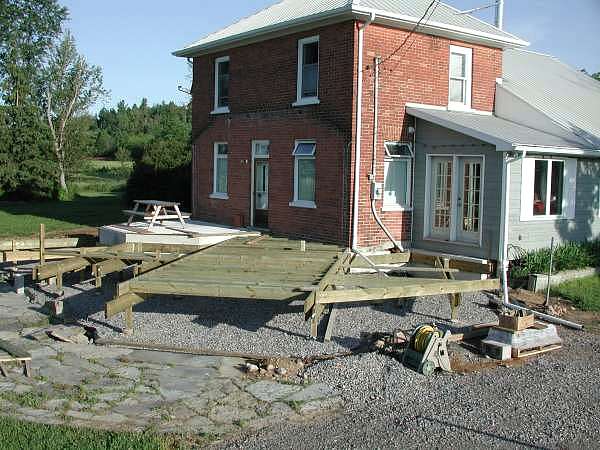
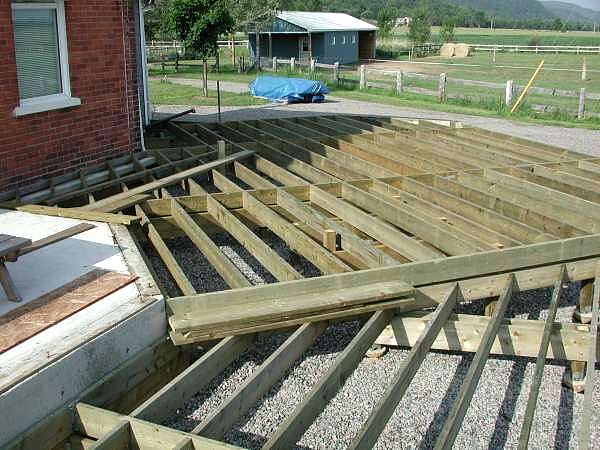
Joists completed... both levels of the deck are now ready for decking boards as soon as the electrical is hooked up in the NE corner.
2003:07:04 17:39:01
Deck07-04xDSCN8650.jpg
65.02 KB; 600x450x24(RGB)
This view shows the transition between the lower deck and the upper. The boards simulate the step between levels; the hot tub will be located to the left on the upper level.
2003:07:04 17:40:06

Deck07-04xDSCN8655.jpg
66.44 KB; 600x450x24(RGB)
This is the view from our bedroom window. The extra beams under the hot tub show here: I'll add some extra joists for additional support from end cuts before adding the decking.
2003:07:04 20:28:55
Deck07-09xDSCN8725.jpg
49.02 KB; 600x450x24(RGB)
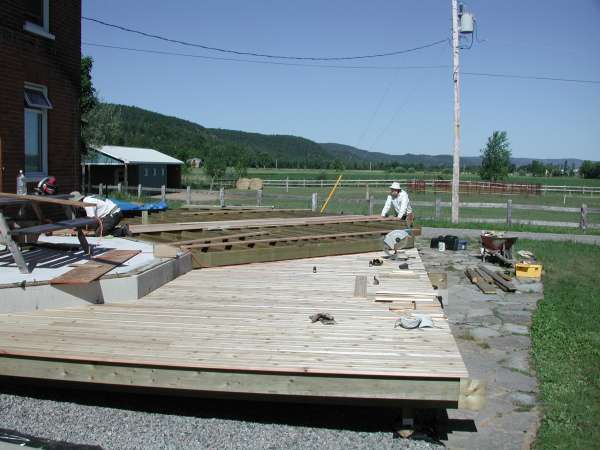
Richard Wegner assessing the starting line of the upper deck after we've cut the ends off the lower part.
2003:07:09 16:46:00
Deck07-09xDSCN8730.jpg
42.13 KB; 600x450x24(RGB)
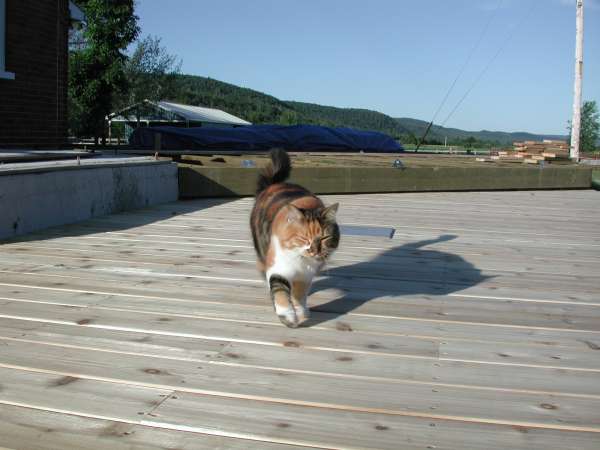
Tigger has been monitoring the progress. Both cats like the cedar because the bugs seem to avoid it. Note the straight screw lines?
2003:07:09 19:03:11
Deck07-11xDSCN8734.jpg
47.92 KB; 600x450x24(RGB)
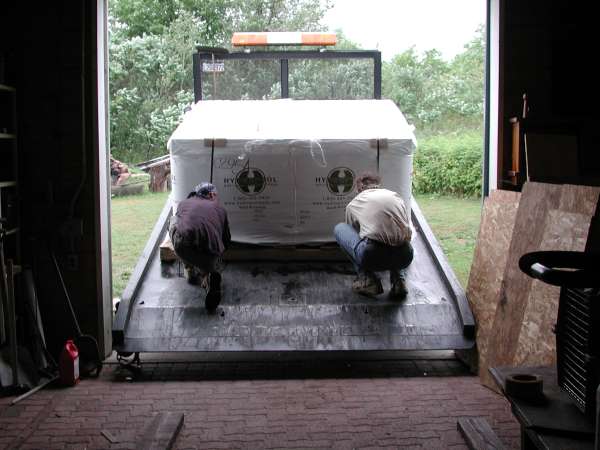
Arrival of the hot tub. We'll keep it in the barn until the deck is boarded. We picked it up using this flatbed from a local tow truck operator -- and I'm not sure exactly how we'll manage to get it up onto the deck!
2003:07:11 10:45:04

Deck08xDSCN9792.JPG
71.24 KB; 600x348x24(RGB)
17 August (we'd been out to Victoria and Vancouver, then Quebec City since the last activity): Erwin's tractor made it easy to get the tub up onto the deck.
2003:08:17 08:43:01

Deck08xDSCN9794.JPG
72.56 KB; 600x402x24(RGB)
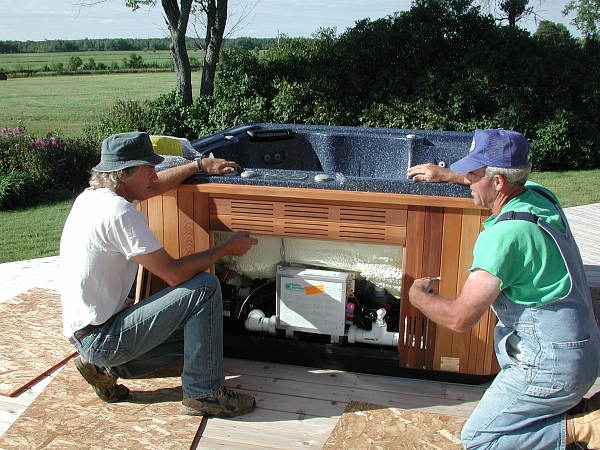
17 August: With the wraps finally off, Erwin, Kathy and Eric could shift it into position. Empty, it weighs about 800 lbs.
2003:08:17 08:59:16
Deck08xDSCN9796.JPG
78.82 KB; 600x450x24(RGB)
17 August: Eric and Erwin discuss the inner workings. The white box is the control panel and wiring; two water pumps and an air pump are nestled in behind and the heating elements are below the panel.
2003:08:17 09:03:14
Deck08xDSCN9799.JPG
75.85 KB; 600x450x24(RGB)
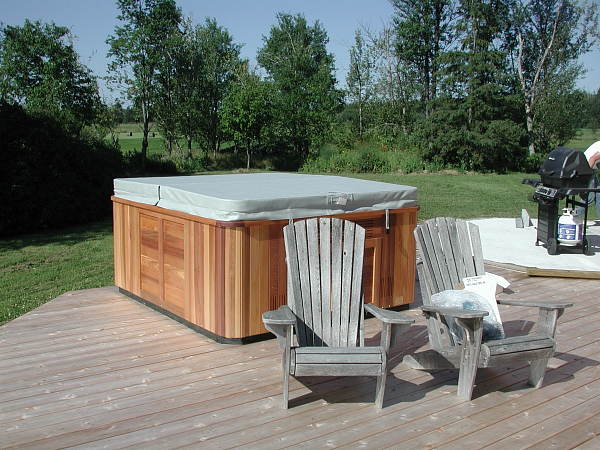
17 August: In place and ready to be wired up. It looks big now but with the porch completed (over the concrete on the right) and the railings and arbour on the left, it should be less massive.
2003:08:17 10:01:34
Deck08xDSCN9842.JPG
65.97 KB; 478x600x24(RGB)
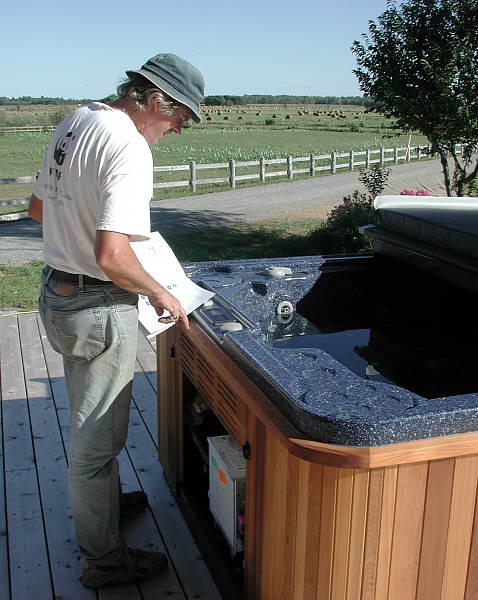
23 August: Wiring is complete and we've filled the tub. Eric is reading the instructions carefully before attempting to turn it on.
2003:08:23 15:56:28
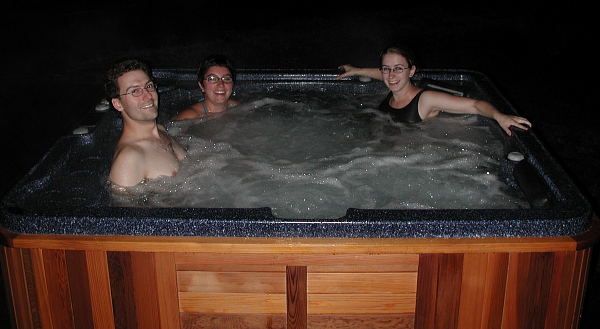
Deck08xDSCN9854.JPG
46.91 KB; 600x329x24(RGB)
26 August: Nigel, Sarah and Erica relaxing in the spa after dinner.
2003:08:26 21:16:14
Home -- Other image galleries -- Work bee at the cottage -- Here --